Recipe For Chocolate Mud Cake

The least stressful way to make a wedding cake at home is to choose a cake that can be made and iced ahead of time. Fruit cakes can live happily for months under an airtight seal of fondant; sadly, fruit cake has fallen out of favor to some degree. A more popular flavor is chocolate mud cake. This recipe will not keep for months, but it will remain moist for several days and can be made further ahead and frozen if required. Because the cake is so dense and rich, it can be served in very small squares like a traditional fruit cake.

This recipe fills a 9-inch round tin but can easily be multiplied for larger tins. A handy maths-free way to determine the quantities needed is to fill a 9-inch round tin and pour the water into the desired cake tins. Three tinsful of water equal three times the recipe!

Ingredients:

 250g butter, chopped
 1 Tbsp oil
 200g dark chocolate, broken or chopped
 1 ½ cups caster sugar
 1 cup hot fresh coffee
 2 eggs

 1 ½ cups self-raising flour
 ½ cup plain flour
 1/3 cup cocoa

How to Make the Chocolate Mud Cake:

  1. Preheat the oven to 160C (320F). Grease and line a deep 9-inch round tin.
  2. Mix the butter, oil, chocolate, sugar, and hot coffee in a medium-sized saucepan. Stir over low heat until the mixture is smooth and glossy.
  3. While the butter and chocolate are melting, sift the flour and cocoa into a large bowl. Make a well in the center. Using a large whisk, pour the chocolate mixture into the dry ingredients and whisk until just combined.
  4. In a small bowl, whisk the eggs together thoroughly – the cake mixture is still hot, so any large strands of egg white may cook in the mixture! When the egg is well broken up, add to the mixture and whisk until just combined.
  5. Pour the thin batter into the cake tin and bake for two hours, or until a skewer inserted into the cake comes out clean. Leave in its tin until completely cold, then turn out. If freezing the cake, leave the baking paper on the bottom and sides of the cake and wrap it in several layers of brown paper, foil, and a plastic bag.

Variations on the Basic Chocolate Mud Cake

 If the cake has several tiers, it can be fun to change up the flavors a little. To easily tell the flavors apart, tint the marzipan layer (the under-layer) of the fondant with the appropriate colors – orange for a jaffa cake, green for peppermint, pink for cherry liqueur. The colors won’t be visible before the slices are cut.
 Add the grated zest of an orange and replace some of the water with orange juice for a chocolate orange cake.
 Chocolate goes well with liqueur – try a splash of Tia Maria, rum, brandy, whiskey, or even crème de menthe.
 Peppermint essence or peppermint chocolate can add a minty tang to the cake.

Tips for Baking a Large Chocolate Mud Cake

 A tripled or quadrupled recipe will take much longer to cook. Cover the top of the cake with foil to prevent burning.
 For very large quantities, heat the wet ingredients in a large saucepan or stockpot, and obtain a large clean heavy-duty plastic bucket to mix the dry ingredients. Nappy buckets or even plastic trash bins can be handy for this, as long as they are used only for cake-making!

How to Make Pudding Pie

Chocolate Pudding Pie Dessert

Whatever the occasion, the one dessert my cousin’s kids beg me to make is Chocolate Pudding Pie. Fortunately, it’s also very inexpensive and simple to prepare. Plus, it doesn’t take a lot of time, so if I’m short on desserts or having company last minute, I can whip it up pretty quickly.

Ingredients

  • 1 ready-made graham cracker pie crust
  • 1 box chocolate instant pudding (5.1 oz. size) – I often skip the vanilla pudding and just double the chocolate! But, you do you boo!
  • 1 box vanilla instant pudding (5.1 oz. size)
  • 5-6 cups of 2% or whole milk
  • 8-16 oz. heavy whipping cream (8 oz. makes 2 cups whipped cream, 16 oz. makes 4)
  • 2 tablespoons sugar (or sugar substitute)

Directions

Pie

  1. Prepare vanilla pudding by mixing the packet with 2 1/2 to 3 cups of cold milk. (The less milk you use the more mousse-like the consistency. I use 2 3/4 cup for more of a classic pudding texture).
  2. Prepare the chocolate pudding and keep separate from the vanilla pudding.
  3. Pour vanilla pudding into the ready-made graham cracker crust until halfway full.
  4. Cover vanilla pudding with chocolate pudding until crust is nearly full (leave about 1/4″ unfilled to make cutting easier later on and room for whipped cream)
  5. Cover pie and refrigerate for at least 2 hours (up to 24 hours)

Whipped Cream

  1. Pour one or two cups of heavy whipping cream into a cold metal or glass bowl
  2. Using an electric mixer, beat on high until soft peaks form
  3. Add sugar or sugar substitute to taste (1 tablespoon per 8 oz. heavy whipping cream is usually sufficient)
  4. Continue beating until desired consistency

Tips

I recommend allowing guests to put whipped cream on their own pie as everyone has different preferences. Putting the whipped cream on the pie in advance is not recommended as it can become runny in the refrigerator.

You will probably have extra vanilla and chocolate pudding. Pour the pudding into tall milkshake glasses (alternating vanilla and chocolate) and top with whipped cream for those who don’t like pie crust.

I use Keebler Ready Crust, which comes in several flavors and sizes. For a larger pie, buy the “two extra serving size.” No extra pudding is necessary, but you won’t have any leftover.

For a kids party, or just for fun, make extra pudding and buy the “mini graham cracker” crusts. Then let the kids fill the crusts themselves. You can also put out toppings like sprinkles, coconut, or chopped nuts for decoration.

Ready-made crusts can also be found in chocolate, shortbread, and fat-free varieties. The flavor makes no difference; use any kind.

Chocolate and vanilla are my family’s favorite, but pudding comes in different flavors too. Match two of your favorites, or for picky eaters, make one that is all chocolate or all vanilla.

Feature image credit: Photo credit: djwtwo on VisualHunt.com

3 Easy Casseroles

Three Easy Casserole Recipes-min

During a busy holiday season, nothing is more comforting than a trusted casserole. Loved ones will appreciate the aroma of the delicious food baking in the oven.

Casseroles were designed for convenience. They can be made in advance and refrigerated or frozen for baking later. Or they can be whipped up and cooked right away. Since many casseroles are also one-dish meals, cleanup is easy, so hosts can enjoy their guests.

Healthy Fish Casserole Recipe

Sometimes it’s nice to have something besides standard holiday turkey, ham, and roast beef. Fish is not only delicious; it’s healthy for the heart.

Ingredients

  • Cooking spray
  • 3 tbsp. olive oil
  • 1 diced onion
  • 1 cup of white wine
  • 1-1/2 pound of white fish fillets
  • 2 tsp. Italian seasoning
  • 1 cup whole wheat bread crumbs
  • 1/2 tsp. garlic powder
  • 1 cup shredded cheese (Swiss or mild cheddar)
  • Salt and pepper to taste

Directions:

  1. Spray a casserole dish with cooking spray.
  2. Heat 2 tbsp. olive oil in a skillet.
  3. Sauté the diced onion until translucent. Add the wine and cook until the wine is reduced to half.
  4. Pour sautéed onions and wine into the casserole dish. Layer it with the fish fillets.
  5. Bake in a 400-degree oven for approximately 12 to 15 minutes until the fish flakes with a fork.
  6. Sprinkle the Italian seasoning over the cod and add salt and pepper to taste.
  7. In a medium bowl, mix 1 tbsp. oil with the garlic powder. Gently fold the bread crumbs into the mixture. Sprinkle the bread mixture on top of the cod. Add the cheese.
  8. Return to the oven for approximately 5 to 10 more minutes, until the cheese has melted.

Holiday Vegetarian Casserole

Vegetarians will appreciate being thought of during holiday meals. This dish can be prepared in advance and baked right before the meal.

Ingredients

  • Cooking spray
  • 1 large package of ziti pasta
  • 1 14 ounces can of diced tomatoes
  • 1 15 ounces can of kidney beans
  • 1 15 ounces can of navy beans
  • 1 24 ounces jar of prepared spaghetti sauce
  • 1 cup shredded cheddar cheese
  • 1 cup shredded mozzarella cheese

Directions:

  1. Spray casserole dish with cooking spray.
  2. Cook pasta according to the directions on the package. Drain and put it back into the pot.
  3. Add diced tomatoes, spaghetti sauce, kidney beans, and navy beans.
  4. Pour the mixture into the casserole dish.
  5. Sprinkle the cheddar cheese and mozzarella cheese over the top.
  6. Bake in a 350 degree oven for approximately 40 to 45 minutes.

Easy Potato Side Dish Casserole Recipe

Quick and inexpensive, potatoes are a favorite among adults and children. This potato casserole is filled with flavor and easy to make.

Ingredients

  • Cooking spray
  • 1 bag thawed hash brown potatoes
  • (Optional) 1 cup diced cooked ham
  • 1 can condensed cream of chicken or cream of celery soup
  • 2 cups shredded cheddar cheese
  • 1/2 cup diced red bell pepper
  • 1/2 cup melted butter
  • 1 diced onion
  • Salt and pepper to taste

Directions:

  1. Spray casserole dish with cooking spray.
  2. In a large mixing bowl, combine hash brown potatoes, ham if desired, soup, 1 cup of cheese, melted butter, diced onion, salt, and pepper. Mix well.
  3. Pour the mixture into the casserole dish.
  4. Sprinkle the rest of the cheese and the diced red bell pepper over the top.
  5. Cover and bake in 350-degree oven for approximately 1 hour.

Casseroles are perfect for the dinner menu at home, offering as a holiday food gift or bringing to a covered dish dinner. Attach a recipe card so others can make it later.

Wine Storage Tips

Proper Wine Storage Tips White Glasses
Proper Wine Storage Tips Red and White Glasses
How you store your wine can have a direct impact on its shelf life. This post features proper wine storage tips to improve your wine's shelf life.

The following is a guest post from Firstleaf wine membership club. This post is not sponsored, however they did send me a bottle of their wine to try.

The special occasion — a new job, an anniversary, a new addition to the family — is finally here. You’ve been saving a bottle of wine just for this. Maybe you got it at a long ago winery visit. Maybe it’s a bottle you’ve been saving from the day of your wedding. 

Now it’s time to finally open it. But wait! The cork has dropped into the wine! Or the liquid looks grainy and separated. Or has an off smell. What happened? Suddenly all the good vibes from the special day are gone.

Unfortunately, improper wine storage can lead to unhappy moments like these. The wine subscription service Firstleaf has put together a guide to make sure this never happens to you.

How to Build Wine Storage covers everything you need to know about keeping wine for longer than a few weeks.

  • The science behind wine storage
  • An overview of the main types
  • How to build your own

Why Is It So Important To Store Wine Correctly?

The flavor of wine is actually quite delicate. Even a few minutes in a hot car trunk could ruin it. But if you store wine properly, it will not only stay delicious, it will develop deeper flavor that you can enjoy when you drink it.

It’s okay to keep wine on the kitchen counter if you plan to drink it in the next few weeks, but any wine you plan on storing for more than six months requires some sort of refrigeration, or naturally cooled location like a basement. Wine must be kept close to 55 degrees Fahrenheit for long-term storage, and most of our homes are a lot warmer than that!

A few other things to know:

  • Avoid direct sunlight, which can quickly heat the wine up even on cool days
  • Keep the wine horizontal. This keeps the cork moist. If the cork dries out it shrinks and may drop into the wine. 

The Main Types of Wine Storage

There are three main types of wine storage. 

Wine Racks

A wine rack goes in your kitchen or bar area. It has space for 10-15 bottles to lay horizontally. A wine rack is for short-term storage of wine you plan to drink in the next few months. Wine racks must be hidden away from direct sunlight, and shouldn’t be kept next to anything that gets lot, like the stove or your toaster.

Wine Refrigerators

A wine refrigerator is the simplest option for long-term storage of wine. These appliances are designed especially for wine and will hold a certain number of bottles. They keep the wine at the proper temperature and humidity to ensure quality.

Wine Cellars

Traditionally wine was kept in underground cellars, which stayed cool year-round. But many of us live in homes without basements — or if we have them, we heat them. So a modern wine cellar is usually a room that is build especially for storing wine, with custom heating and cooling elements.

How to Build Your Own

There are a few interesting options for DIY wine storage, especially racks. They make a good beginning woodworking project. See Firstleaf’s guide for more details.

Wine Storage Tips From First Leaf

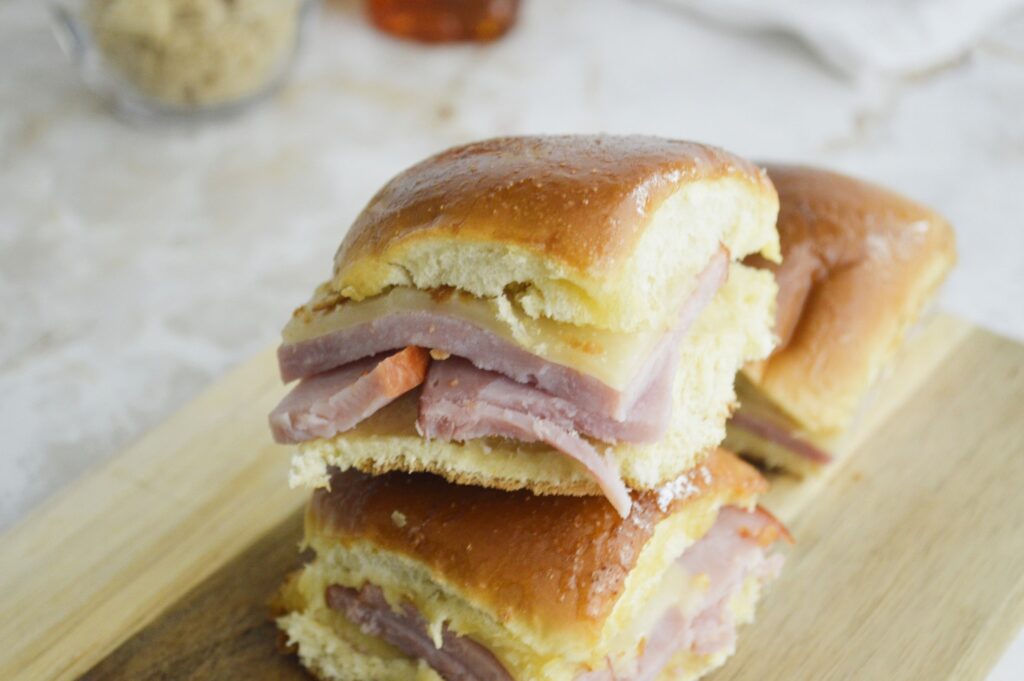
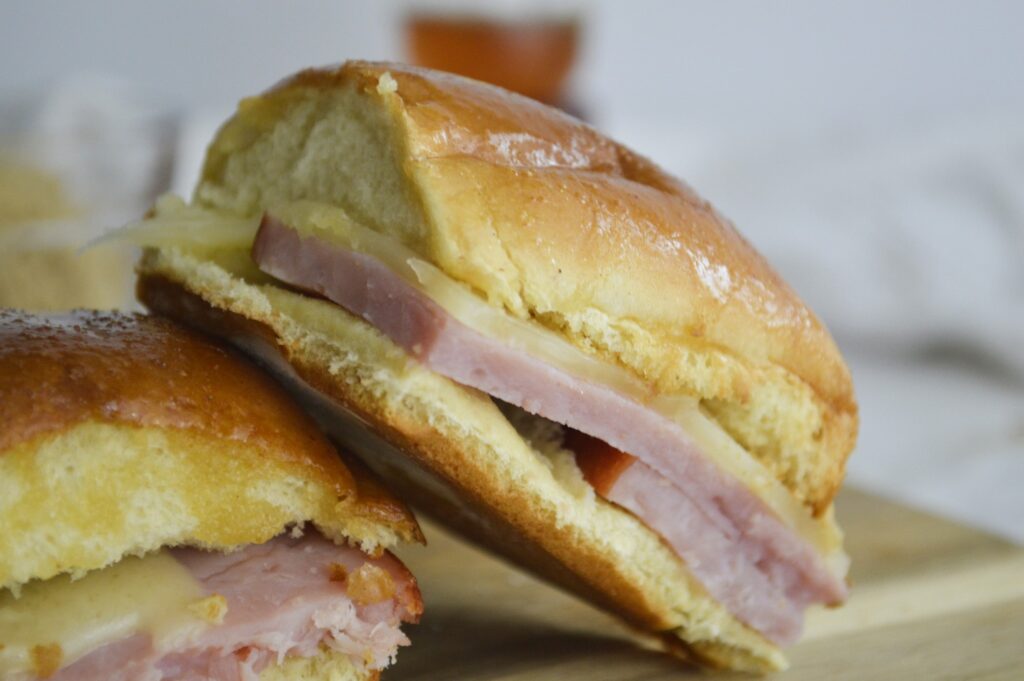
Ham & Cheese Sliders with Brown Sugar and Honey Glaze

Recipe for Ham & Cheese Sliders w a Brown Sugar and Honey Glaze


Prep: 2 minutes
Makes: 12 sliders
Cook Time: 15 minutes

Ingredients:

  • 1 12 pack Hawaiian Dinner Rolls
  • 12 oz. of thick ham
  • 4-6 slices swiss cheese or similar
  • 1 tbsp. butter
  • 1 tbsp. brown sugar
  • 1/2 tbsp. honey

Directions:

  • Place dinner rolls on a baking sheet and use a serrated knife to slice them half.
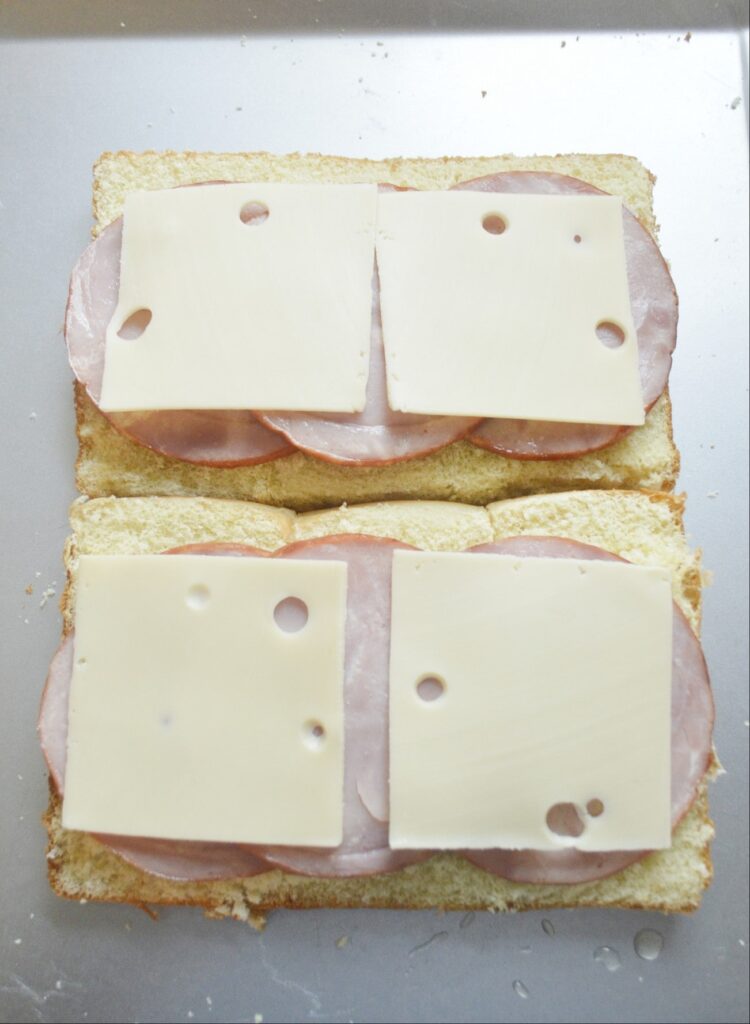
  • Place ham and cheese on the bottom buns and set the top half of the buns over the ham and cheese.
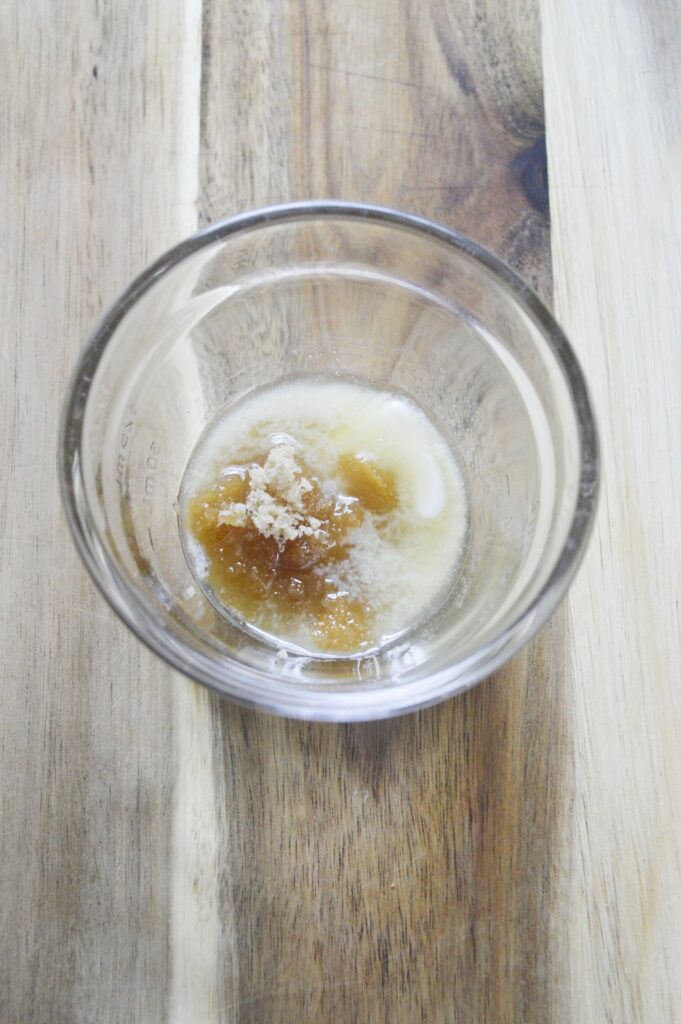
  • In a small bowl melt butter and whisk in the brown sugar and honey.
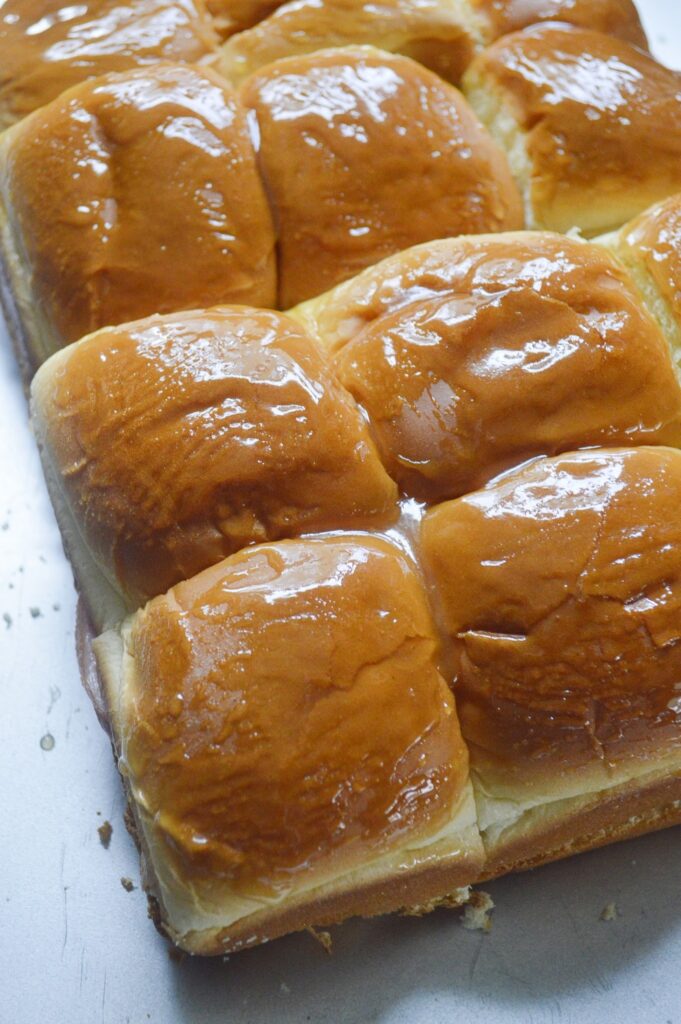
  • Brush the brown sugar glaze over top of the buns.
  • Bake at 350 degrees for about 15 minutes or until the buns are golden brown and cheese is melted.
  • Cut and serve

Absinthe Cocktail Recipes How To Dance With The Green Fairy

Because of the almost 100-year ban on the drink, the U.S. isn’t exactly brimming with absinthe recipes; expert mixologists are busy making up for the lost time.

Absinthe purists recommend La Louche as the one perfect way to drink absinthe: drip 2-3 ounces of ice-cold water over a sugar cube on a slotted spoon into the beverage until it turns cloudy, and enjoy.

Indeed, that’s the traditional European method of drinking absinthe; but Americans have never really been too enthusiastic about blindly sticking to European traditions. Those of us who can only sit around dreamily puffing Dunhills and misquoting Oscar Wilde for so long want a more “modern” experience. Thus the rebirth of the absinthe cocktail is forcing dancing with the Green Fairy to encompass more than a few new steps.

Absinthe and Fruit Cocktails

Sugary fruits balance the bitter or bittersweet flavor of absinthe without overpowering it. Recipes call for about 1-2 ounces of real absinthe and approximately 2 ounces (or to taste) of chilled fruit juice, limeade, or lemonade. Pour the absinthe into a glass first, add the mixer, and stir or shake vigorously in a cocktail shaker.

A couple of easy beginner absinthe-and-fruit cocktail recipes are as follows:

 Pour 1.5 ounces of clear absinthe, ¾ ounce lemon juice, and ¾ ounce simple sugar syrup into a shaker, and shake vigorously. Strain into a cocktail glass and top off with soda water.

 Shake ½ ounce absinthe with 1.5-2 ounces passionfruit or mango puré e; strain into a champagne flute. 1 ounce dry sparkling wine or Brut Champagne may be added if desired.

Fresh pear nectar, grapefruit, or pomegranate juice are also highly recommended as delicious absinthe mixers.

Combining Absinthe with Other Spirits and Liqueurs

These are for the adventurous, as absinthe is definitely strong enough all by itself. Still, some drinkers will want to experiment and see how absinthe mixes with their other favorite alcohols. Just remember that one of these is almost always enough.

Sean S. Graves from Nantucket’s Brant Point Grill has invented the Green Monster: Shake 1 ounce absinthe with 1 ounce Crème de Menthe and 1 ounce heavy cream. Strain into an ice-filled cocktail glass; garnish with mint.

Champagne lovers may simply combine their favorite bubbly to taste with 1.5 ounces of absinthe in a flute. This potent concoction is from Vieux Carré Absinthe and is appropriately called Death in the Afternoon. A ½ ounce of Crème de Violette and/or some blackberry syrup is sometimes included in variations on this type of recipe, too.

Less gutsy drinkers may wish to start out merely rinsing their glass with absinthe before pouring in the French Champagne or sparkling wine. Simply pour some absinthe into a glass, swirl until the inside is coated with the liquid, and discard the alcohol itself. This imparts a nice anise flavor without overly intoxicating the consumer. Of course, few dashes of absinthe in place of full ounces may also be substituted in any of the above recipes to decrease a drink’s potency.

½ ounce of absinthe may also be added to any standard martini or another favorite cocktail recipe to yield an interesting flavor and powerful punch.

Absinthe and Coffee or Tea: Cocktails with Caffeine

A popular way to drink absinthe involves mixing it with coffee after a meal. Because of absinthe’s bitterness, absinthe-and-coffee drinks are usually sweetened and topped with a dollop of whipped cream. Absinthe contains a stimulant, to begin with, though, so combining it with caffeine is not for everyone.

Green Fairy Coffee combines 1-ounce absinthe with 1 cup of hot black coffee; top with sweetened whipped cream.

Tea aficionados will prefer ¼ oz. Absinthe in a glass of iced green tea with honey to taste; this blend is said to make a particularly refreshing summertime draught. Conversely, true absinthe-lovers note that substituting hot tea for iced will then produce the ideal warming winter’s eve beverage. In other words, for those who really like absinthe, there doesn’t seem to be any wrong way to drink it at all!

5 Foods That Ruin Your Diet

If you find that you are not losing weight, there are certain foods that may add calories to your diet every day. Here are 5 foods that hurt your diet.

It takes a lot of hard work to lose weight and keep it off. Most experts will tell you that the best way to stay fit is to exercise and eat healthily. However, eating healthy can be a problem if consumers buy and eat the wrong food, liquid, and snacks.

High-Calorie Liquids

Consumers do not count calories when they buy drinks. For instance, coffee and tea with sugar can add 200 extra calories to your diet. Add up the fact that some people drink multiple cups of coffee to stay alert at work, and your caffeine fix can an extra one thousand calories daily. Liquor, juice, and soda are also high in calories that are not counted.

Eating Multiple Snacks

To lose weight, we should eat a few small meals and snacks throughout the day to keep the metabolism going. However, you may eat more snacks than you should if you don’t pay attention to your daily amount. Write down what you have eaten, or set out a specific number of snacks each day. When those are done, know that eating any more will add extra calories to your diet.

Diet Snacks

Some snacks are marketed to people who are trying to lose weight. Due to the fact that they are low in calories, dieters may feel comfortable eating more than they should. Eat the recommended portion and no more.

Pre-Packaged Diet Bags

Companies have also created special snacks that contain 100 calories or less. However, consumers may still eat multiple bags because they think that these snacks are healthy. Eat a snack, but if you’re still hungry, try chewing on celery or carrot sticks to feed your hunger pains.

Fat-Free Food

Food that is fat-free may be high in calories and sugar. Always read the entire food label, and skip snacks that contain too many calories, sugar, and salt. These fat-free food items are often expensive and may hurt your diet instead.

Try to remember that anything besides pure water will contain calories. If the item is claimed to have 0 calories, look at the fat content. To make diet food taste great, companies will often smother it in sugar and salt. Not only are these harmful to your diet, but they are also worse for your blood pressure.

Always do your research when you are shopping for healthy food to lose weight. Candy and gum are also items that can add up to extra calories. The best way to lose weight is to pay attention to what you eat and the number of portions that are on your plate.

Simple Summer Drinks

Summer’s here: What better way to spend the afternoon than with a refreshing drink? Here are four simple cocktail recipes to enjoy – with or without alcohol.

Summer parties, evenings with friends, relaxing on a patio or at the cottage – when the weather warms up, it’s nice to have a sip of something cool. Put your inhibitions aside and let loose with these libations. The best part? You don’t have to be a bartender to master these simple sippers:

The Mimosa

This is a classic, refreshing drink that works any time of day: brunch, lunch, afternoon, or evening. It’s tame and great for those who don’t like the taste of alcohol. Bonus: it’s super simple to make.

In a flute, fill half with cold champagne/sparkling wine and, in the other half, add pulp-free orange juice. To kick it up a bit, play with portions – use three parts champagne to 1 part orange juice. For a fancier look, pour in some grenadine or add some berries. Note: this is a great drink for parties; make it ahead of time in a large pitcher for fast, easy pouring Mimosas.

Alcohol-free version: Swap out the champagne for alcohol-free sparkling wine or soda.

The Strawberry Daquiri

A favorite summertime slush. It’s cold, colorful, and fruity. There are many pre-made daiquiri mixes available at the liquor store, and true, they are delicious, but it’s just as easy to make this drink at home.

While many recipes suggest using frozen strawberries, if fresh berries are available, always use them. For each drink, you’ll need:

 4-5 ice cubes
 5-6 strawberries (remove stem)
 2 ounces of golden rum
 1 tbsp of lime juice
 ½ tsp of sugar
 Optional: add 1 ounce of triple sec

Using a blender or food processor, add all the ingredients together and blend until slushy. Pour into a tall glass and garnish with a strawberry.

Alcohol-free version: Remove all alcohol and replace it with soda or ginger ale.

The Mish Mash

Turn a backyard bash into the Caribbean with this delicious drink. Using a tall glass, fill ¾ with Sprite or 7Up.

Then, add the following ingredients:

 1 ounce of white rum
 1 ounce of coconut rum
 2 ounces of lime juice

A variation of this mish mash includes pineapple juice. Instead of filling the glass up entirely with Sprite/7Up, use two parts Sprite/7Up, 1 part pineapple.

Alcohol-free version: Remove the rum, add pineapple juice. To get the true taste of the Caribbean, you can add a drop of coconut flavoring or syrup.

The Sensational Sangria

This Spanish favorite is a perfect recipe for a party; it’s easy to make in advance, and many people will enjoy it. There are tons of Sangria recipes out there; some use white wine; others use juices. Feel free to substitute ingredients and make your own Sangria signature!

In a large pitcher, pour a whole bottle of red wine. Take ripe berries and toss them into the wine. This is a great time to clear out the fridge. Raspberries and blackberries work really well with this drink as they absorb the alcohol and break up nicely in the pitcher. You can use fresh strawberries as well. Cut two oranges and one lemon into slices, and toss those into the mix. Add 2 ounces of Triple Sec and a splash of lemon juice. Fill the remainder of the pitcher up with Sprite and add about 1 cup of ice.

It’s best to make the Sangria in advance and allow the fruit to sit in the juice. When it’s time to serve, scoop out some fruit for every guest and fill the glass with Sangria.

Alcohol-free version: Replace red wine with cranberry juice. Remove Triple Sec. The drink will have the same look, sans alcohol.


Summer Salads

Summer is salad time. It’s so easy to put a salad together, as part of the meal or even the meal itself. Remember presentation counts, keep the salad simple, and add a splash of color. Use fresh ingredients whenever possible.

Salad Vegetables

Lettuce

Inspect your lettuce before buying, make sure the leaves look healthy, not limp. Always wash the lettuce before use. Invest in a good lettuce spinner. To keep lettuce longer wash, spin, and store wrapped in a paper towel and packed in a zip-lock plastic bag.

 Lettuce: Romaine - crisp, sturdy lettuce, great for robust salads, sandwiches, and wraps.
 Ice Berg or Head or Crisp head lettuce - The two terms are interchangeable. This is a crisp lettuce, perfect for a sturdy salad, or just right in a sandwich or with salsa or in a taco.
 Boston or Butterhead: delicate leaves that need little or no dressing except maybe a squirt of lemon. Be gentle washing it.
 Leaf lettuce: Anywhere from green to bright red. This is a good basis for a salad. I especially like the red leaf lettuce, good color. I like to use this lettuce as a base for a salad.

Other greens:

They can add great flavor, color, and texture to a salad.

 Parsley- usually put it on last.
 Basil - Use Italian.
 Spinach - baby spinach is best.
 Mint

Other vegetables:

A salad shouldn’t just be lettuce; add a bit of color and texture with other vegetables.

A great investment is a mezzaluna knife. Just perfect for chopping and mincing vegetables, but a simple paring knife is also good.

 Cucumber- Usually two kinds are sold in most grocery stores- field and long English. Long English is best for most salads. You don't need to peel it, but you should wash it before use. Field cucumbers are wonderful in Greek salads or salads that don't have lettuce.
 Tomatoes - Cherry, grape, and Roma are great for most salads. For a Greek salad, try a beefeater if you're going to make the salad ahead of time, add the tomatoes last.
 Onions- I like red, especially for Greek salads. Red onions add color and spice to almost any salad. A simple trick if you don't like the sharp taste is to chop the onion, bath it in fresh lime juice, and put it in the refrigerator overnight or for at least four hours. White Spanish onions are wonderful sliced thin.
 Peppers- My favorite pepper is orange. Red is probably best for Mexican, or peel the pepper first, totally optional. I like the peppers sliced thin.
 Carrots - There's the baby carrots that come in spring and early summer, and the bigger kind that a wonderful all summer long. To fancy it up a bit, try peeling the entire carrot, so you get long orange strips. You can curl up the strips.
 Potato salad recipe.
 Nuts and Sunflower seeds nuts add protein. They're a real boon for any vegetarians in your life or if you just don't feel like meat today. I especially like nuts with spinach. Make sure the nuts are well chopped - here are ones I use: cashews, pistachio, and walnuts. Sprinkle sunflowers on top of a completed salad.
 MeatIf you have leftover chicken or ham (never more than a day old and always from the refrigerator), use them in a salad. Please read Summer food safety Salmon, which is wonderful with a bit of mayo, finely chopped celery, and gherkins.
 Olives and Pickles - Perk up a salad, especially a potato salad with olives green, black or purple. I love black olives, especially in a Greek salad. Dill pickles and gherkins are great in a potato or a pasta salad.
 Cheese
 Feta is a wonderful salad cheese, especially in a Greek salad with cucumbers, red bell pepper, chopped beefsteak or Roma tomatoes, red onions, and black olives. But there's no reason why you can't sprinkle on feta over any salad just to give it a bit of zest.
 Cheddar is especially good on crisp lettuce.
 Parmesan is lovely with any kind of Mediterranean salad.
 Mozzarella cut it up in cubes and sprinkle them over leaf lettuce. Create your own summer salad sensation.
 Go ahead, experiment!

How To Prevent Or Cure A Hangover

I’m never drinking again…and this time I mean it! How to ease the hangover blues. The symptoms of a hangover vary from person to person, and the type and amount of alcohol consumed. Avoiding and curing a hangover offer many possibilities depending on the level of planning.

Symptoms

Let’s first explore the realm of hangover symptoms. The most common symptoms of over-consumption are headache and nausea. Diarrhea, lethargy, extreme thirst, and sensitivity to light and noise may also be included in the hangover experience.

Avoidance

Clearly, the most obvious way to avoid a hangover is to simply not drink alcohol. There are many occasions a person may feel compelled to drink due to social or other pressures. The choice to imbibe in the consumption of alcohol should be a personal choice not dictated by any outside influences. Consider yourself a stronger person should you decide to abstain.

What to Drink

Should you choose not to abstain, choose alcoholic beverages that contain less alcohol. Different people react differently to different types of alcohol. Beer and wine contain less alcohol than hard liquor. The downside to wine is the added sulfur in most wines that can create a headache for some people. Draft beer may cause a hangover for some people where bottled beer may not. Even the brand of beer may cause a hangover in some people where other brands may not. Know what your body tolerates best and stick with it.

How to Drink It

If you are consuming hard liquor, add a mixer; water, soda water or tonic is best. Adding sugar-based mixers, such as juice or soda, is a sure-fire way to produce a pounding headache in the morning. Dehydration is the most common symptom of a hangover. A good rule of thumb is to drink one full glass of water with every alcoholic beverage consumed. Do not mix different types of alcohol. If you start the evening with vodka, end the night with vodka.

Last Minute Cure

Taking an over the counter pain medication with a full glass of water before bed can help alleviate the discomfort of a hangover. Be sure to read the warning label to make sure the pain medication is compatible with alcohol.

Do not drink and drive. The worst hangover you can ever have is waking up in the morning with the realization that you have killed another human being.

How to Cure a Hangover

Okay, so you didn’t drink enough water, you accepted the sweet shots, you drank whiskey, vodka, and beer and now you are just trying to figure out how to survive the day.

Hydration

Water is good. Water with electrolytes is better. Choosing a sports drink with as low sugar content as possible is the best alternative. A re-hydrater, like Pedialyte, is another good choice. Pedialyte is found in the baby section in grocery or drug stores.

Food

Foods that are high in protein and carbohydrates are best. I always like to make a breakfast that includes all of the basic food groups for my hung-over guests. Fried potatoes mixed with vegetables and topped with cheese and eggs, bacon on the side. This is not a healthy, everyday meal. This is the occasional hangover recipe.

Move Your Body

It may be very hard to believe that movement will improve matters, but it will. Clean up after last night’s party, do the laundry, take a walk around the block, move your-self around as much as possible while hydrating. Finding the will-power to be productive is much harder than the actual performance.

Do Not Drive

Driving while hung-over can be as bad as driving drunk. If you are feeling the previous evening’s effects, you most likely still have a substantial amount of alcohol in your system. This will affect your judgment and reaction time. Dealing with the” day after” is much easier than dealing with a lifetime of sorrow.